
Notify me when available
Get notified when the product is available again
It's totally free

Lithuanian Bots
Robots tutorials
Smart solutions for robots – faster, simpler, more efficient
How to Build a Combat Robot: Beginner 200 g Plastic Antweight
22.11.2026 Evgeny and Domynikas
This guide shows how to build RUSH, a beginner horizontal spinner for the 200 g Plastic Antweight category. All parts are available at lithuanianbots.com, and the chassis and weapon are 3D printed.
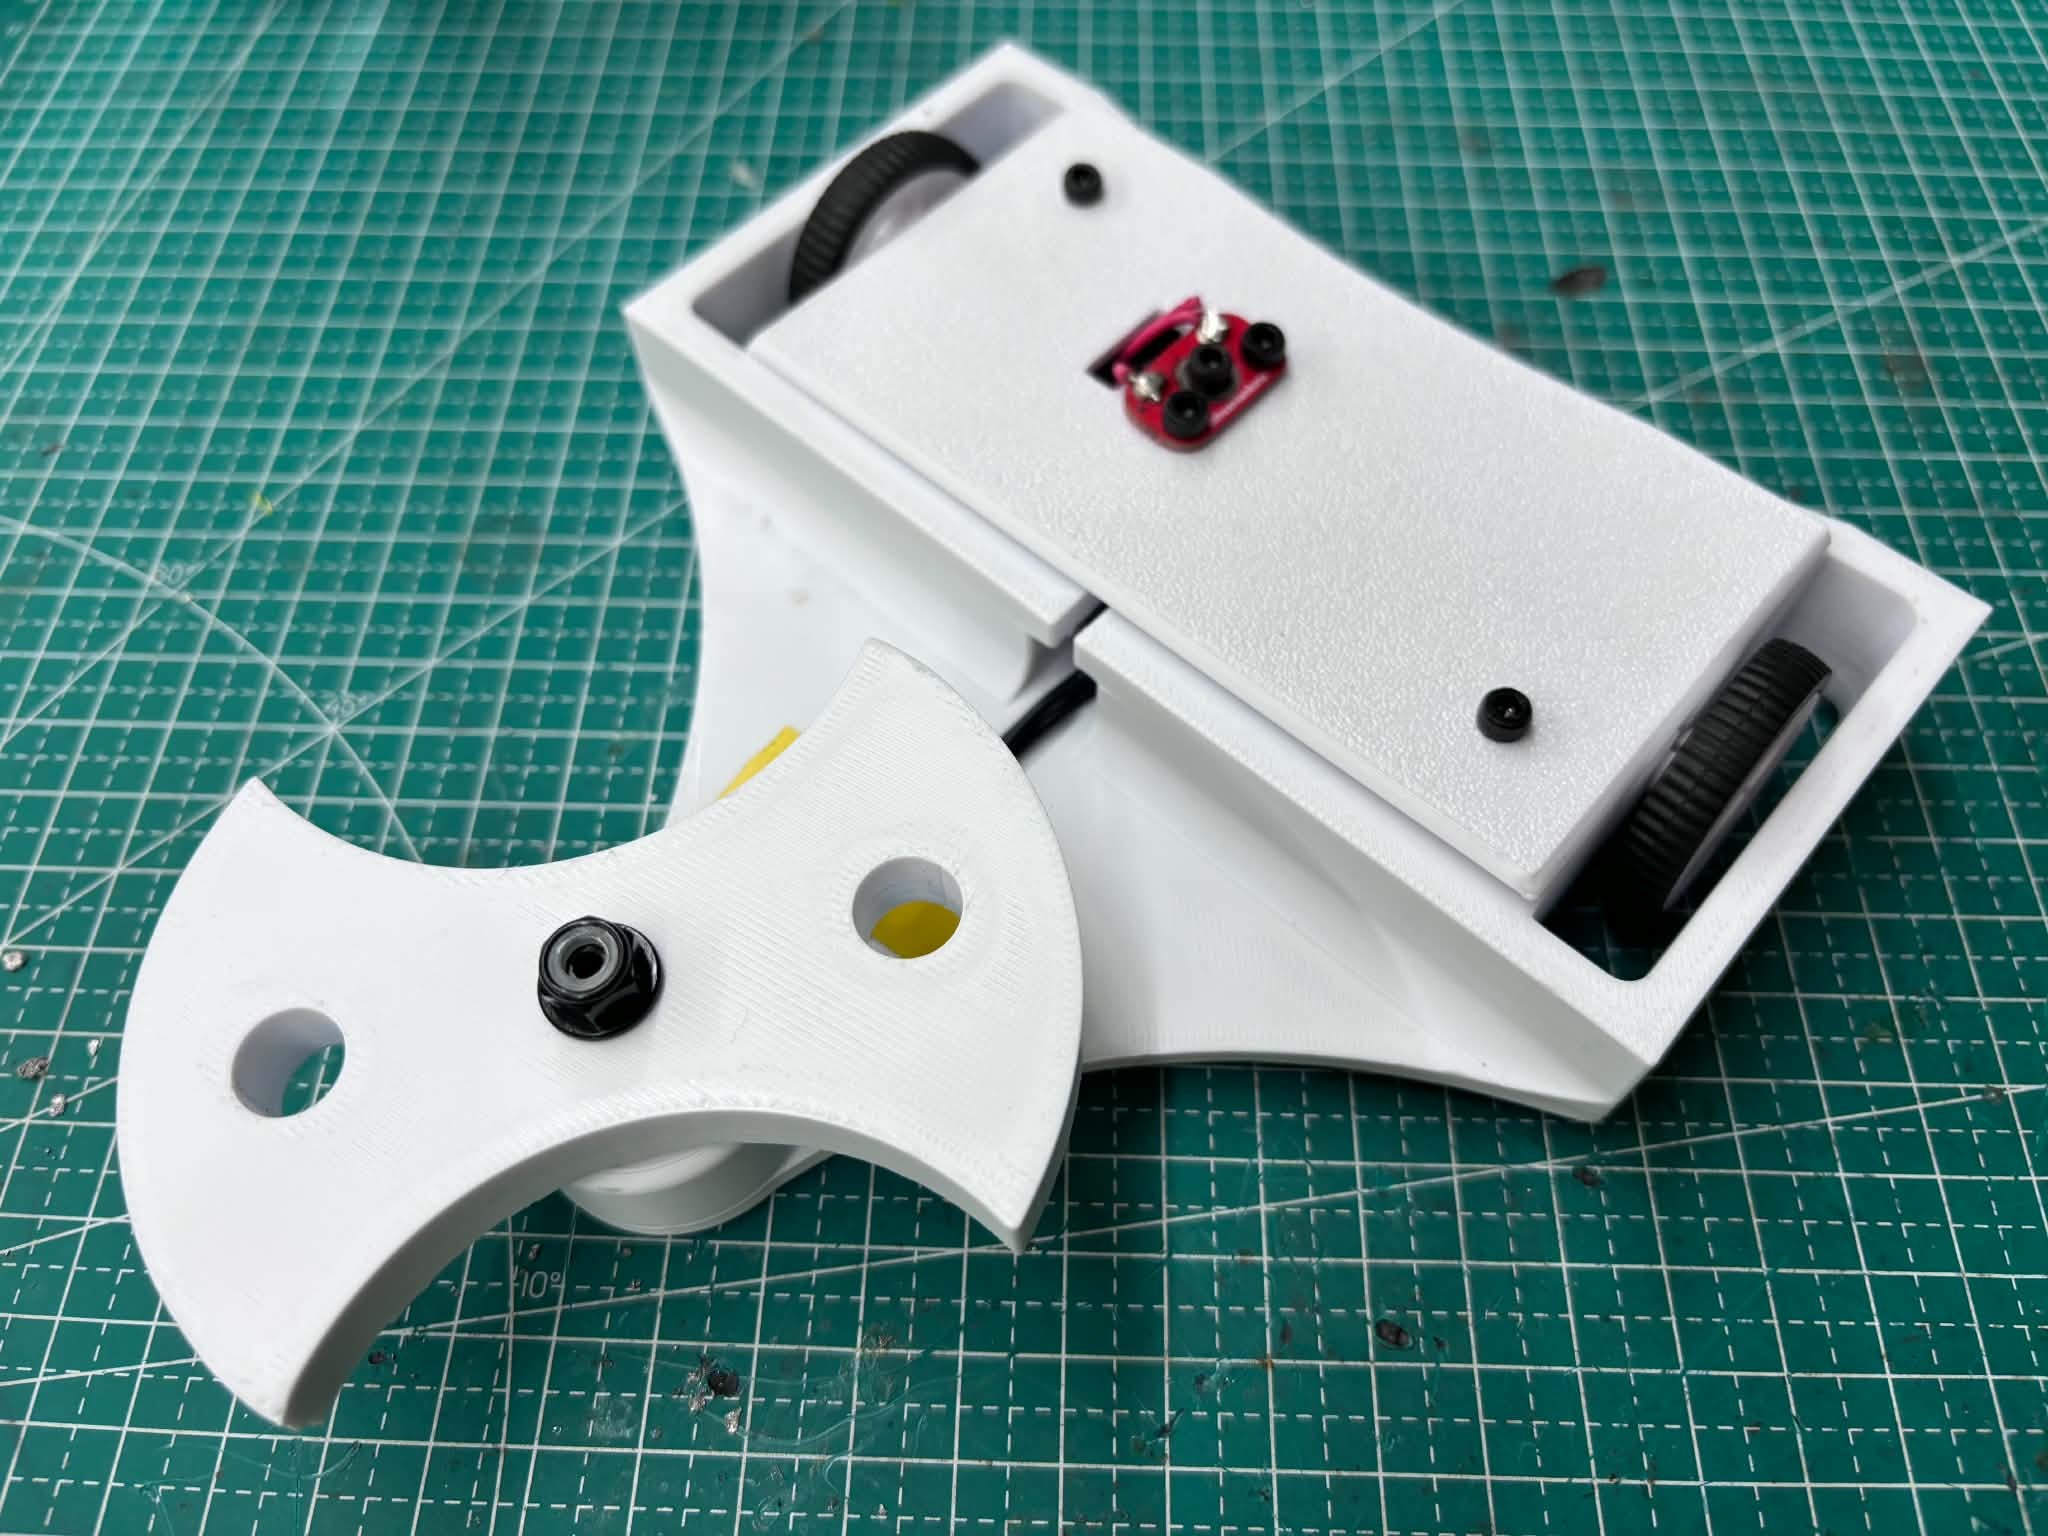
1. Picking the Parts
- Motors. Almost every robot in this category uses 6 V N20 or N10 brushed gearmotors. For beginners, 500-600 RPM is recommended. Motors as fast as 1000-1500 RPM make the robot much harder to drive and control (speaking from experience).
- Wheels. Buy premade wheels from suppliers such as AliExpress or Pololu.
- Controller. One of the most popular controllers is the Malenki Nano. Most versions include a built-in FS2A receiver, motor drivers, and two PWM outputs for an ESC or servo. Think of it as a drone AIO (all-in-one) board.
- ESC. The ESC (Electronic Speed Controller) runs the BLDC weapon motor. You don't need a powerful one in this category. Most robots use a 20 A, 7.4 V bidirectional ESC.
- Weapon motor. One of the most commonly used is the 1408 2800KV BLDC motor.
- Battery. Most robots in this category use 2S LiPo batteries, typically 150-300 mAh.
- Power switch. Most robots use a power switch, and many competitions require one. The best type for a combat robot is a screw switch.
- Chassis and weapon. Print them from PLA+. It is cheap, lightweight and durable.
- Small parts. Two M3 5 mm screws, and the female version of your battery connector plug.
Recommended parts
Common beginner setup
- 2x N10 600 RPM gearmotors
- 1x Malenki Nano
- 1x 20 A bidirectional ESC
- 1x 1408 2800KV BLDC motor
- 1x 2S LiPo battery (150-300 mAh)
- PLA+ chassis and weapon
- Screw switch
- Premade wheels
This setup is simple, reliable and well suited to a first 200 g Plastic Antweight robot.
2. Tools Needed
- LiPo charger for charging the battery
- Transmitter to control the robot
- Soldering iron and solder
- A tool for cutting and stripping insulation
- Heat shrink tubing or insulating tape
Recommended tools
- LiPo charger: iMAX B6
- Transmitter: FLYSKY FS-i6
- Cutting tool: nipper
3. Soldering the Parts
Follow the Malenki Nano wiring diagram below.
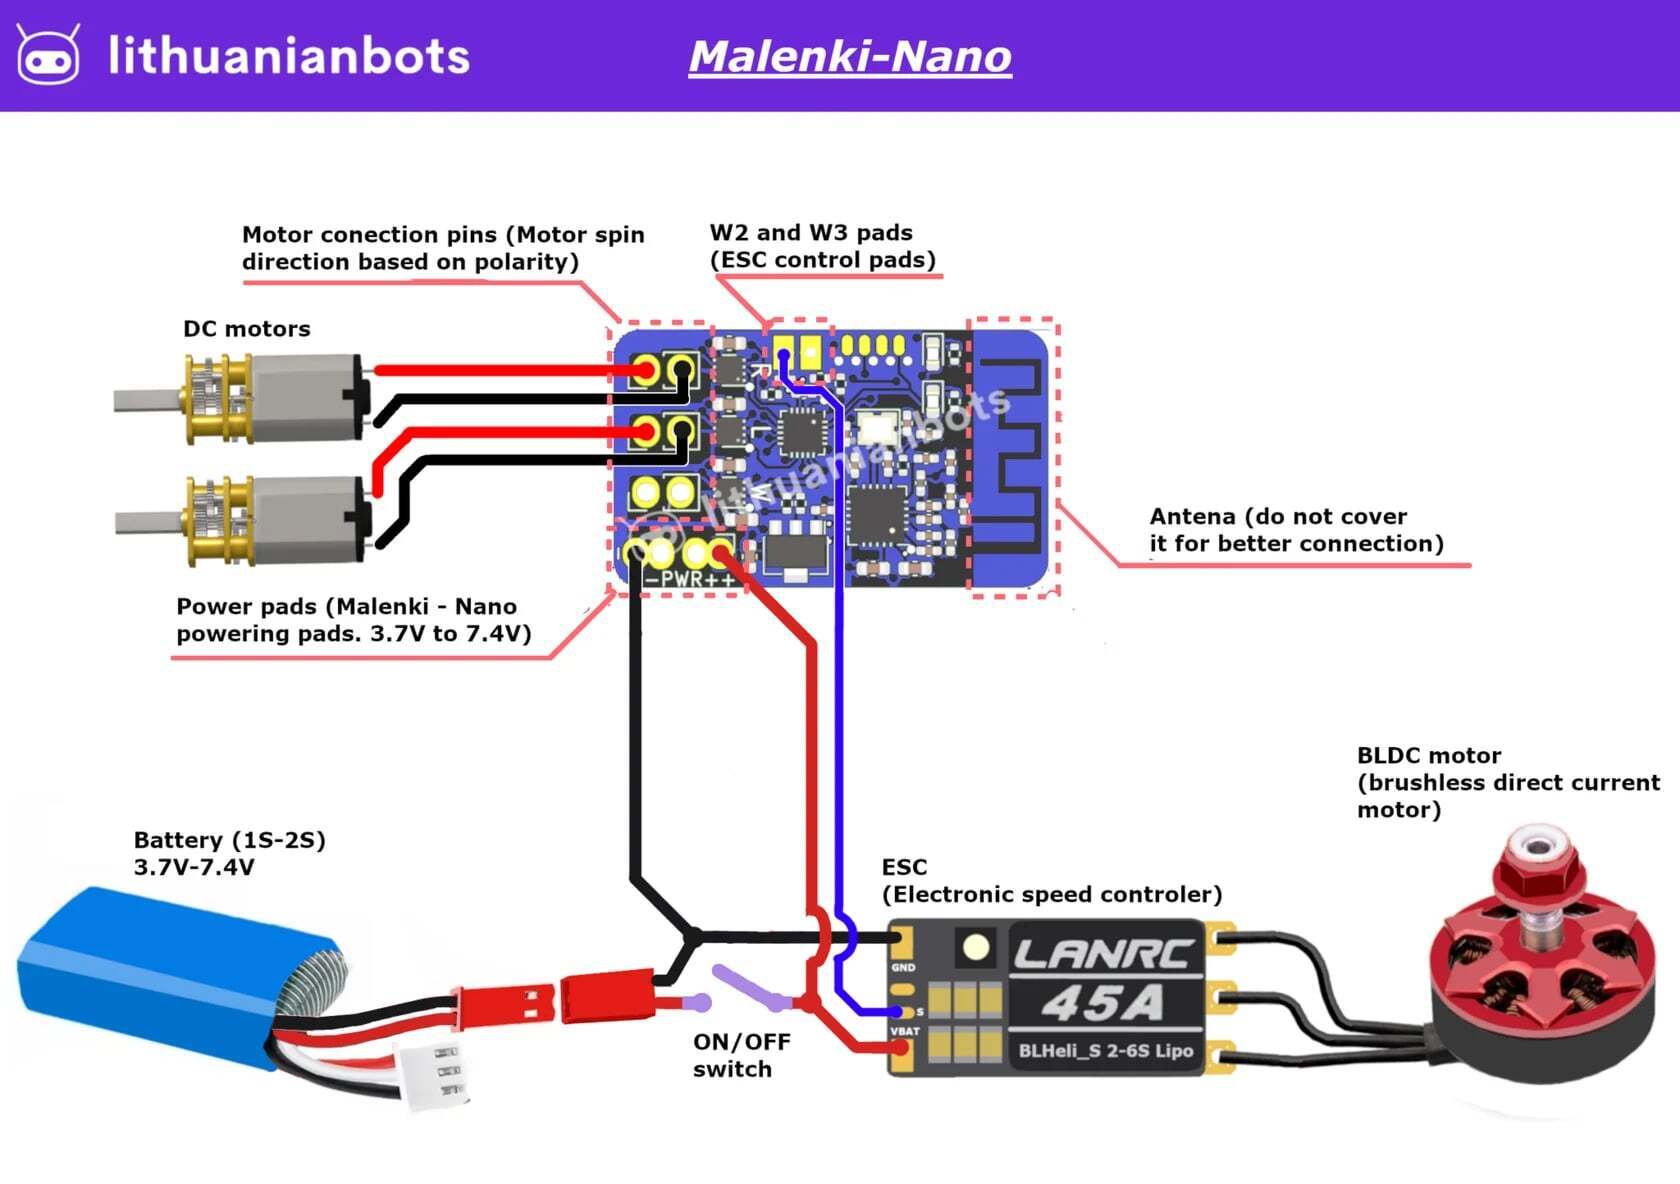
- Drive motors: solder them to the motor pads. The spin direction depends on polarity, so if a wheel turns the wrong way, swap that motor's two wires.
- Battery: the battery's negative wire goes to the PWR- pad on the Malenki Nano and to the ESC's GND. The positive wire goes through the ON/OFF switch to the PWR+ pad and to the ESC's VBAT pad. The Malenki Nano accepts 3.7-7.4 V (1S-2S).
- ESC signal: connect the ESC's signal wire to the W2 or W3 pad (the ESC control pads).
- Weapon motor: connect the ESC's three output wires to the BLDC motor. If the weapon spins the wrong way, swap any two of these wires.
- Antenna: don't cover it, for a better radio connection.
The diagram shows a 45 A ESC. The wiring is the same for the 20 A ESC.
Tips
- Tin the wire ends before soldering.
- Cover every joint with heat shrink or tape.
- Double-check polarity before you connect the battery. Reversed power can destroy the controller.
4. Assembling the Horizontal Spinner "RUSH"
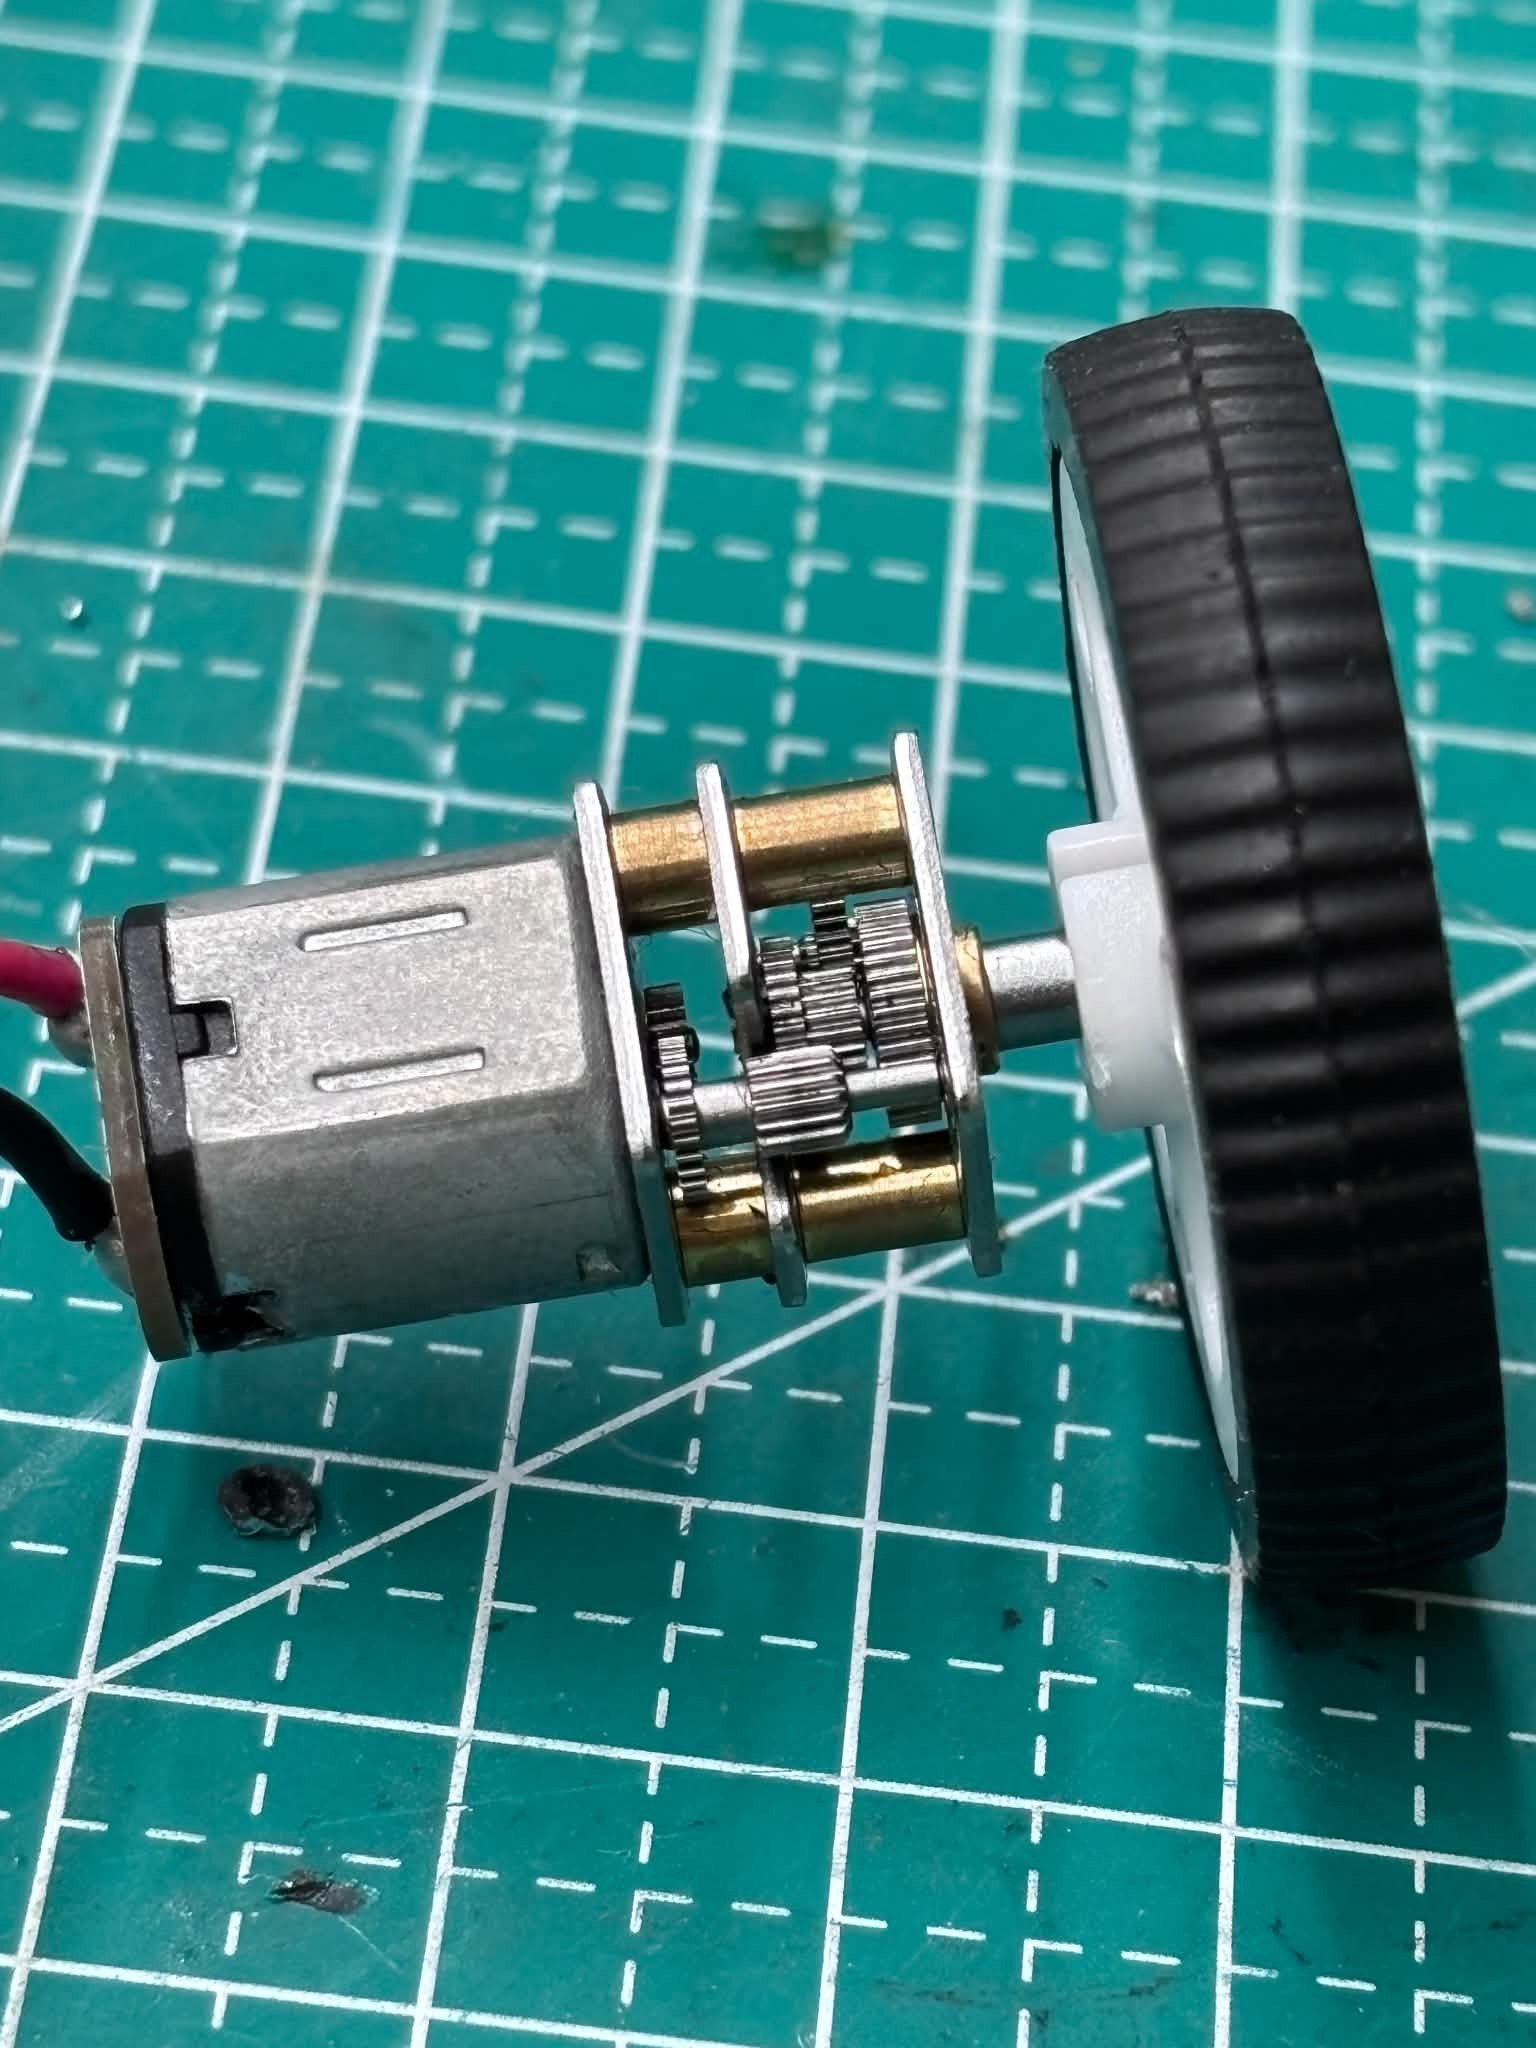
- Mount the wheels on the gearmotor shafts.
- Place the motors in the chassis pockets, with the wheels in the wheel wells, and secure them.
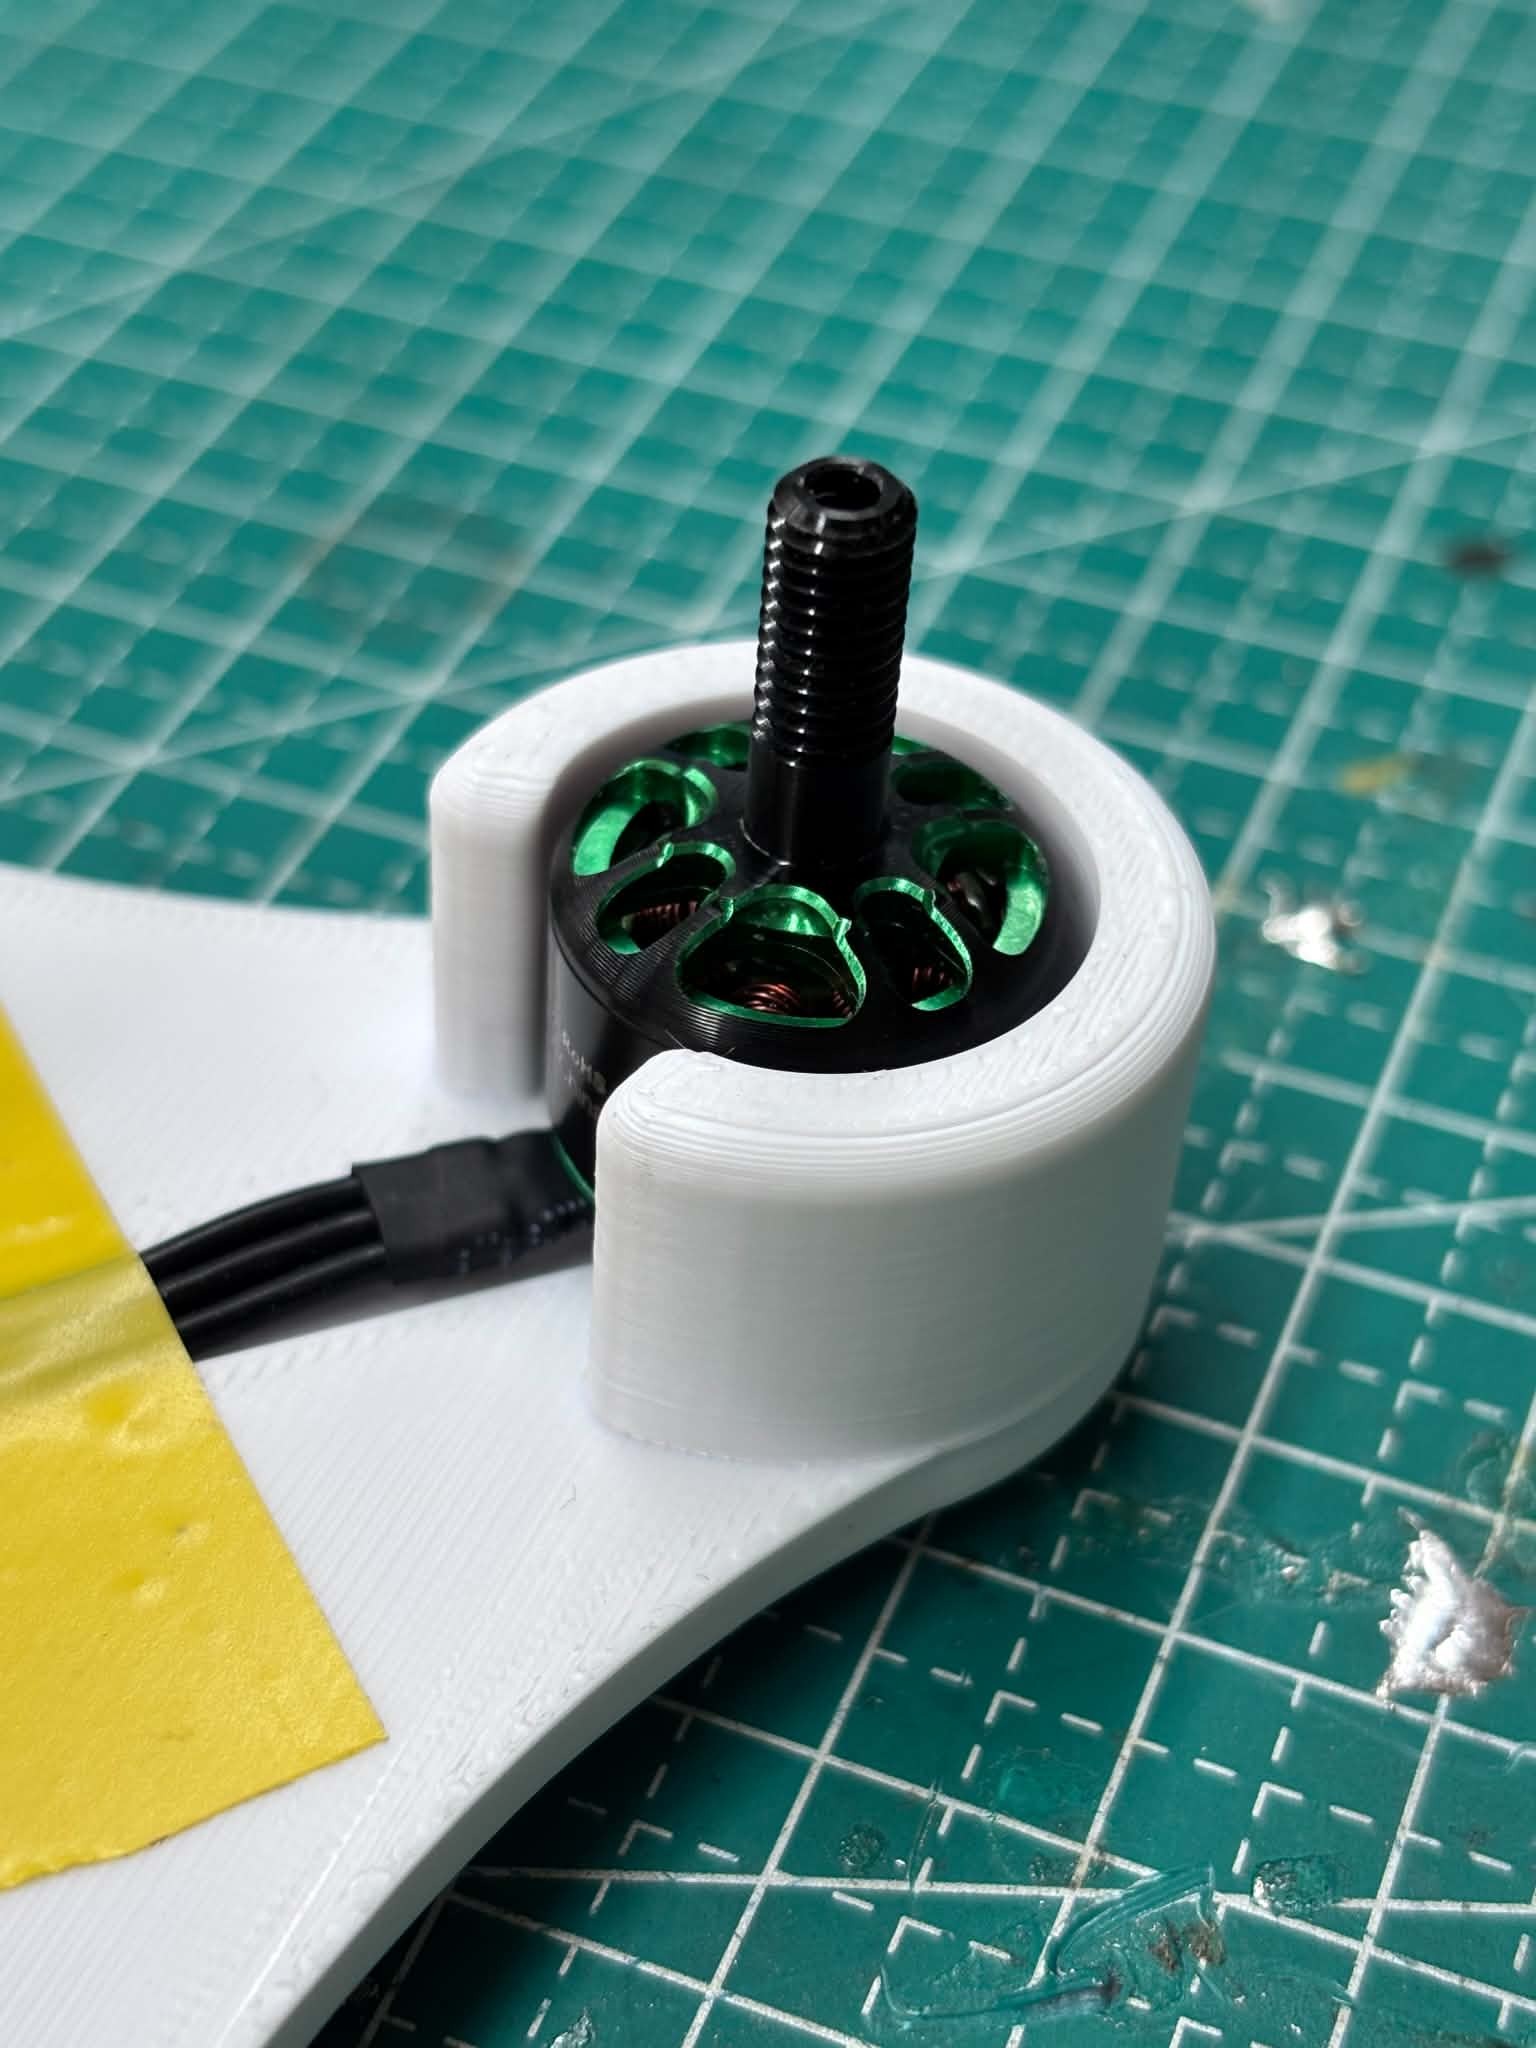
- Install the weapon motor in the printed motor holder, with its wires running through the slot.
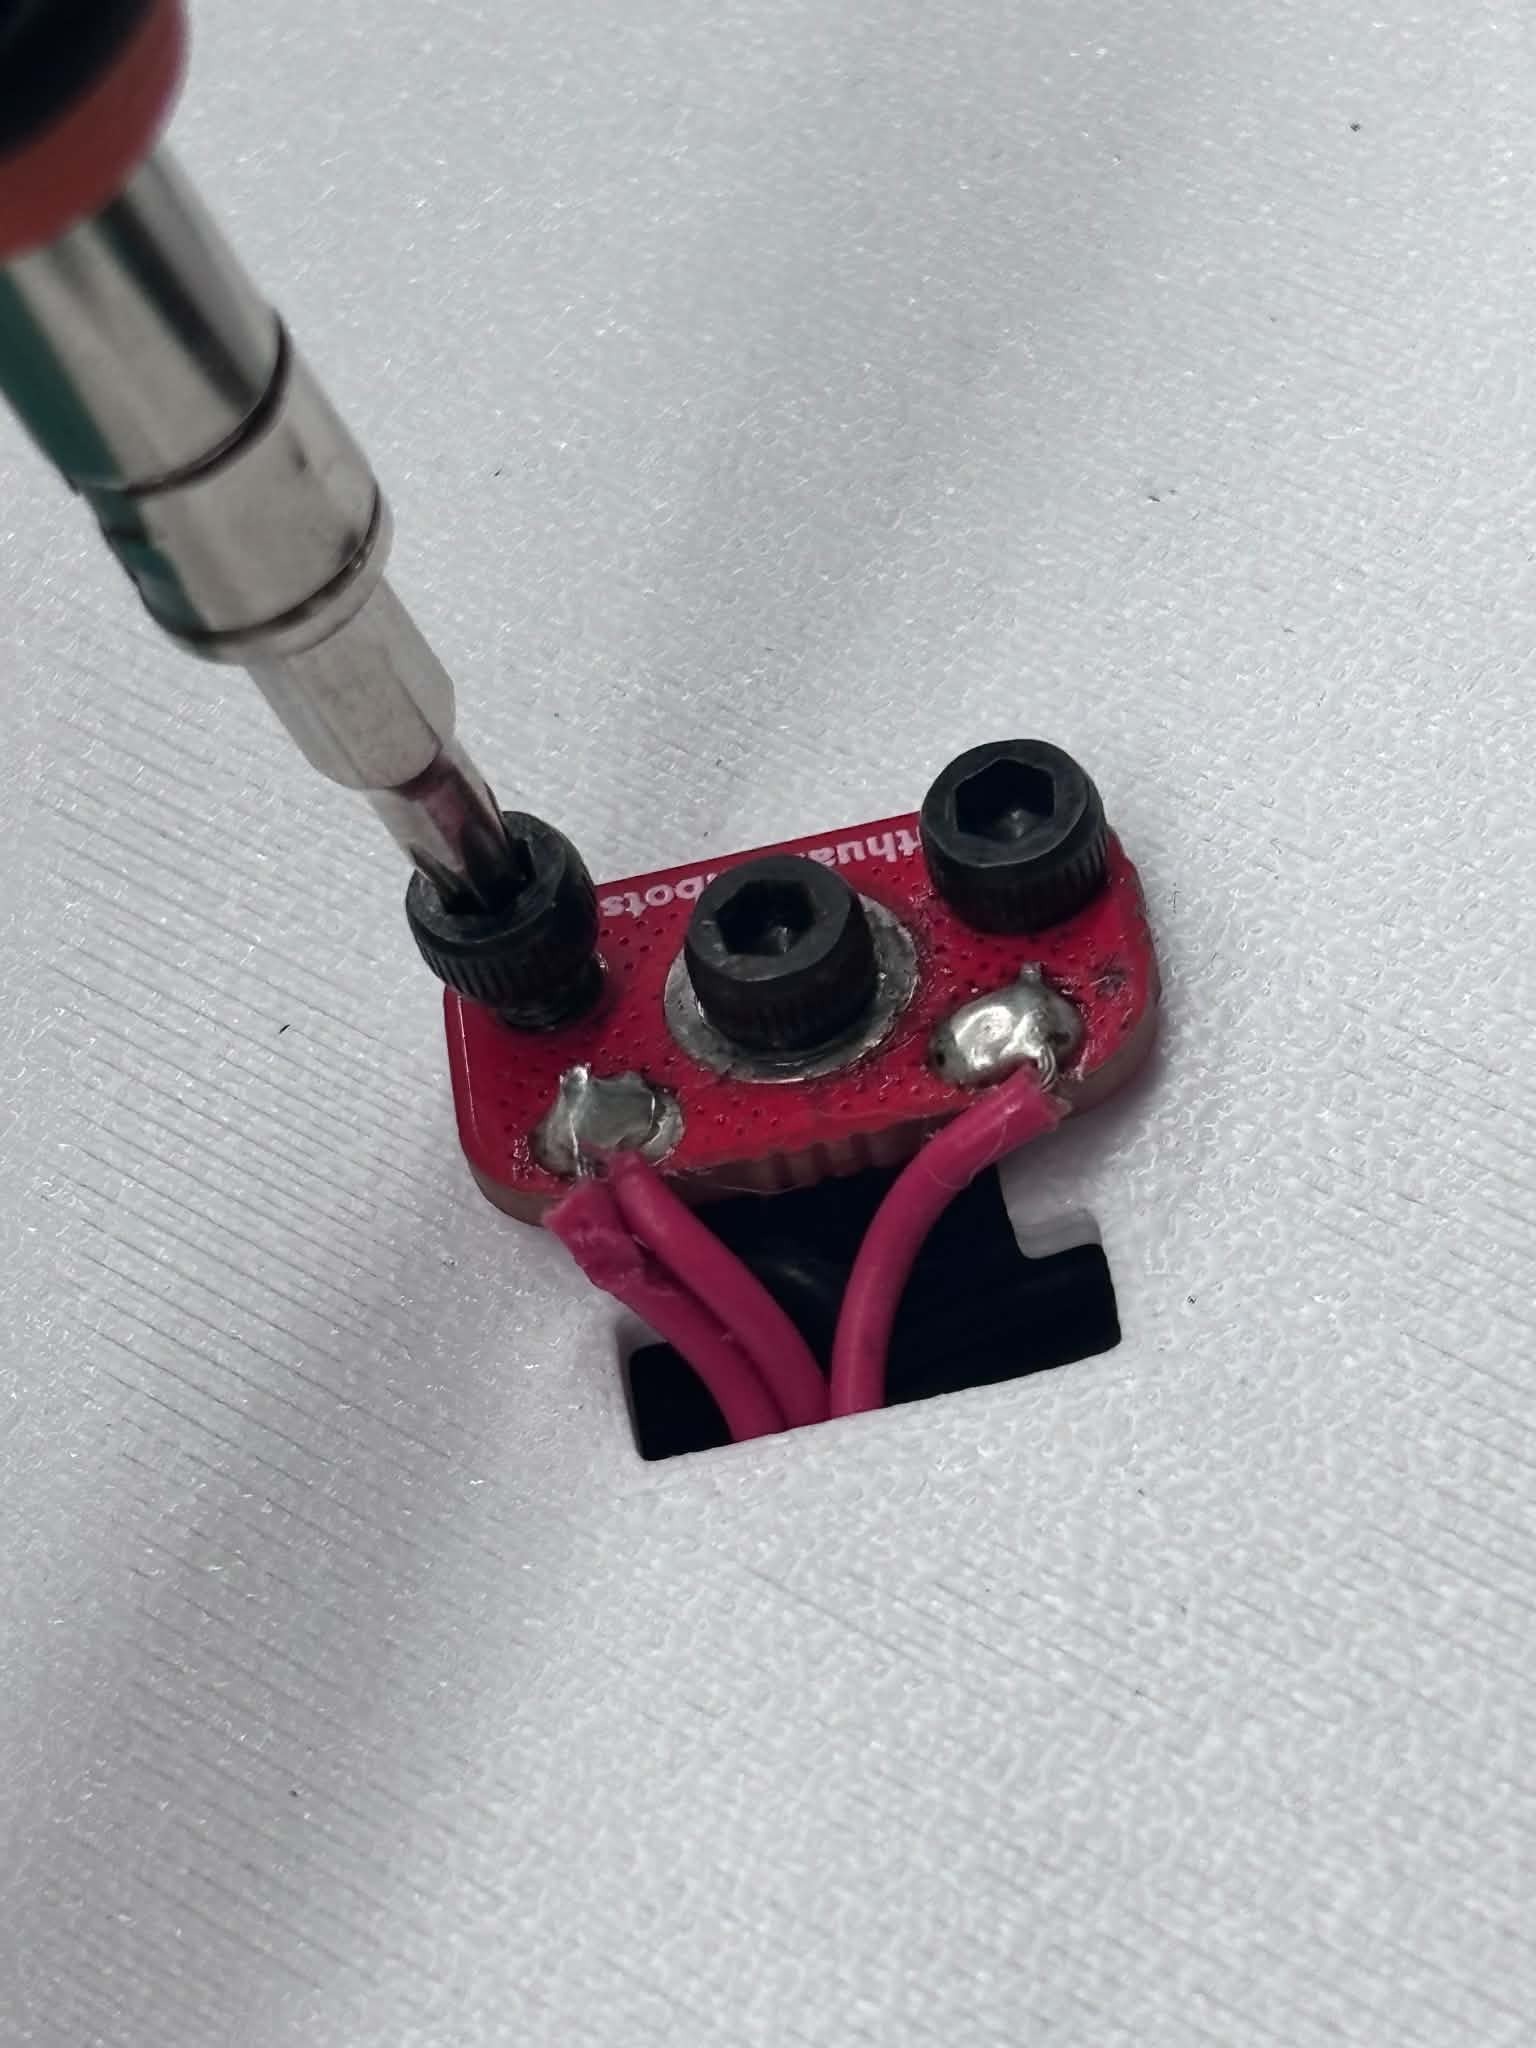
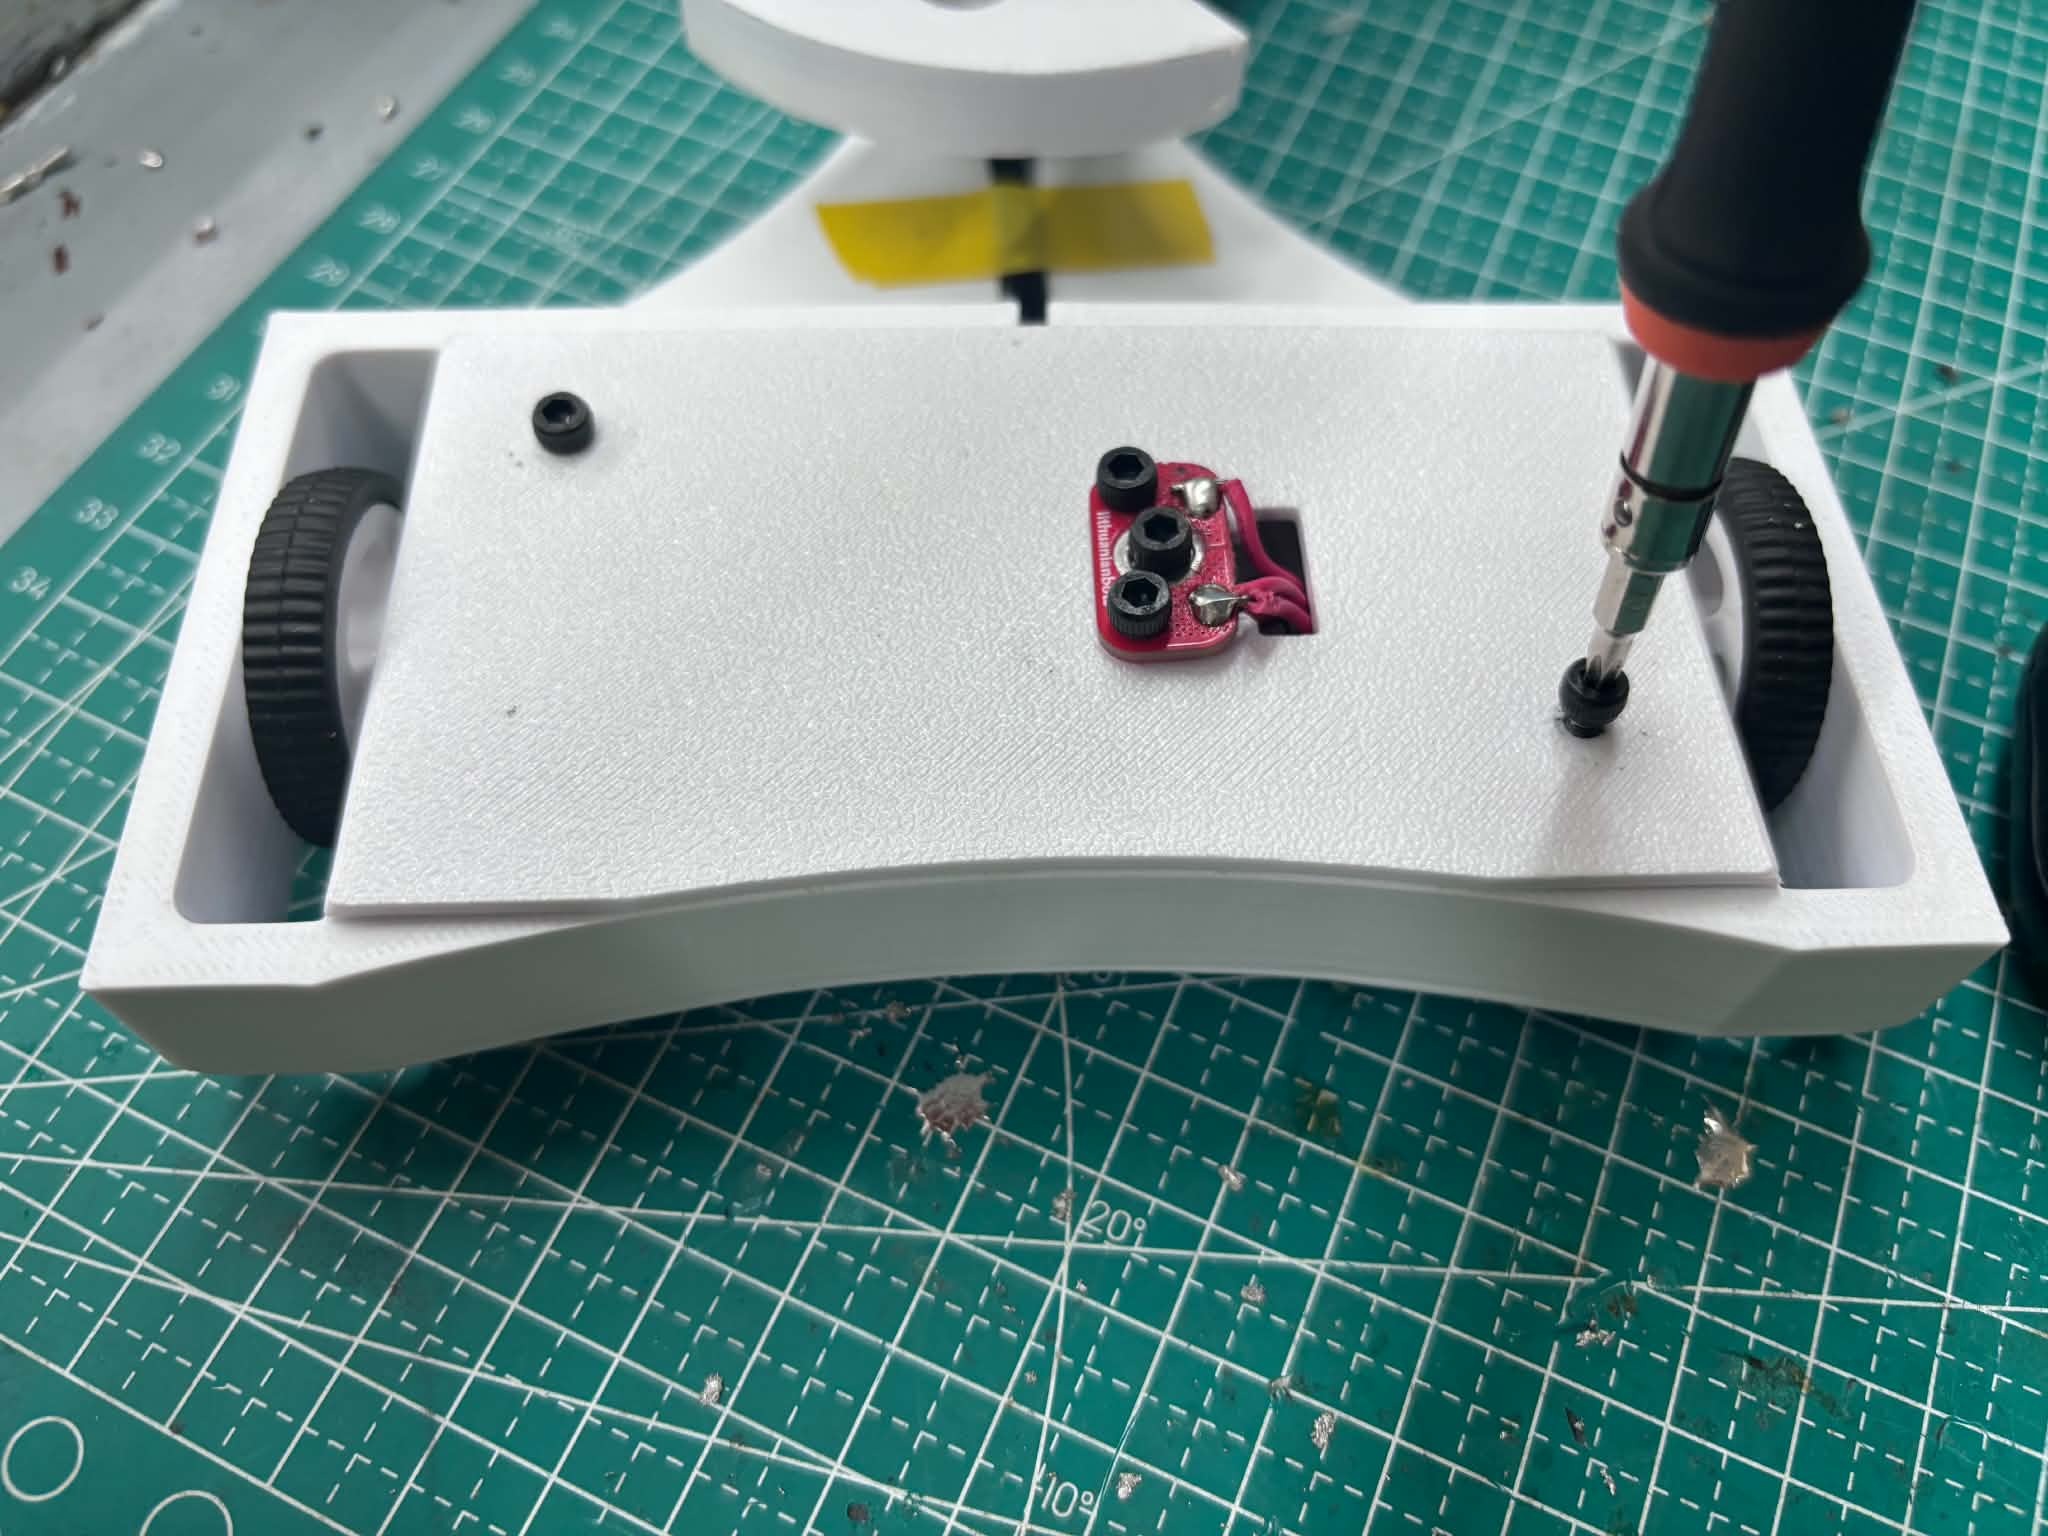
- Fit the screw switch in its slot in the bottom plate and tighten the screws.
- Close the bottom plate and fasten it with screws.
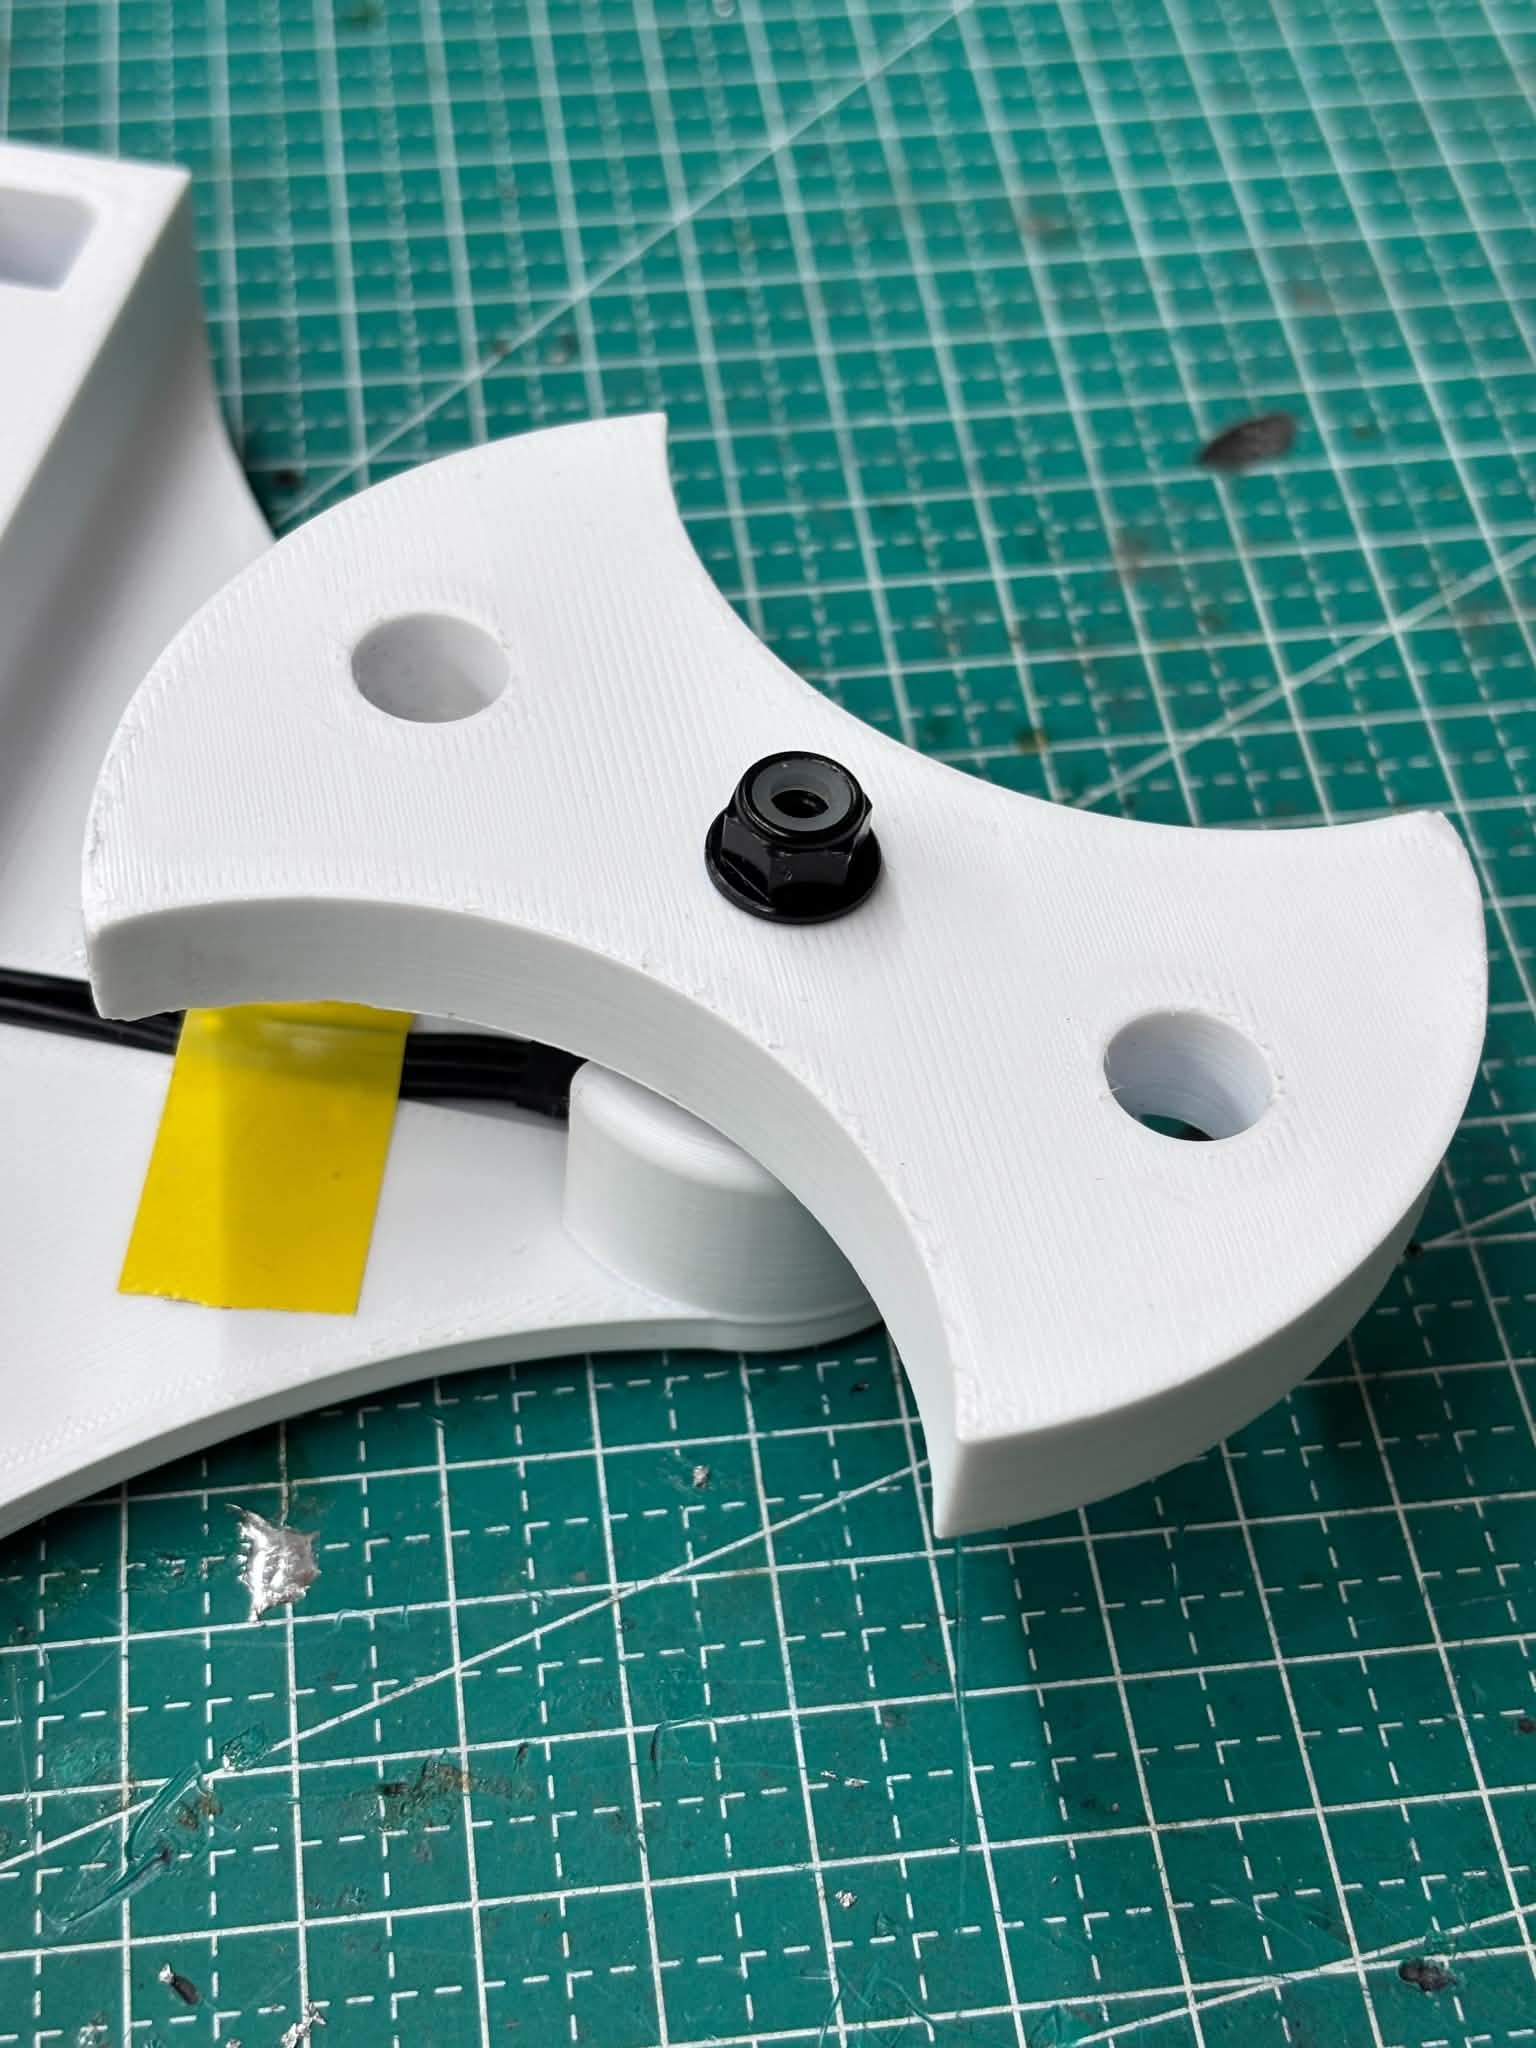
- Attach the weapon blade to the motor's threaded shaft and tighten it with a locknut.
Step 1: N10 gearmotor with the wheel mounted.
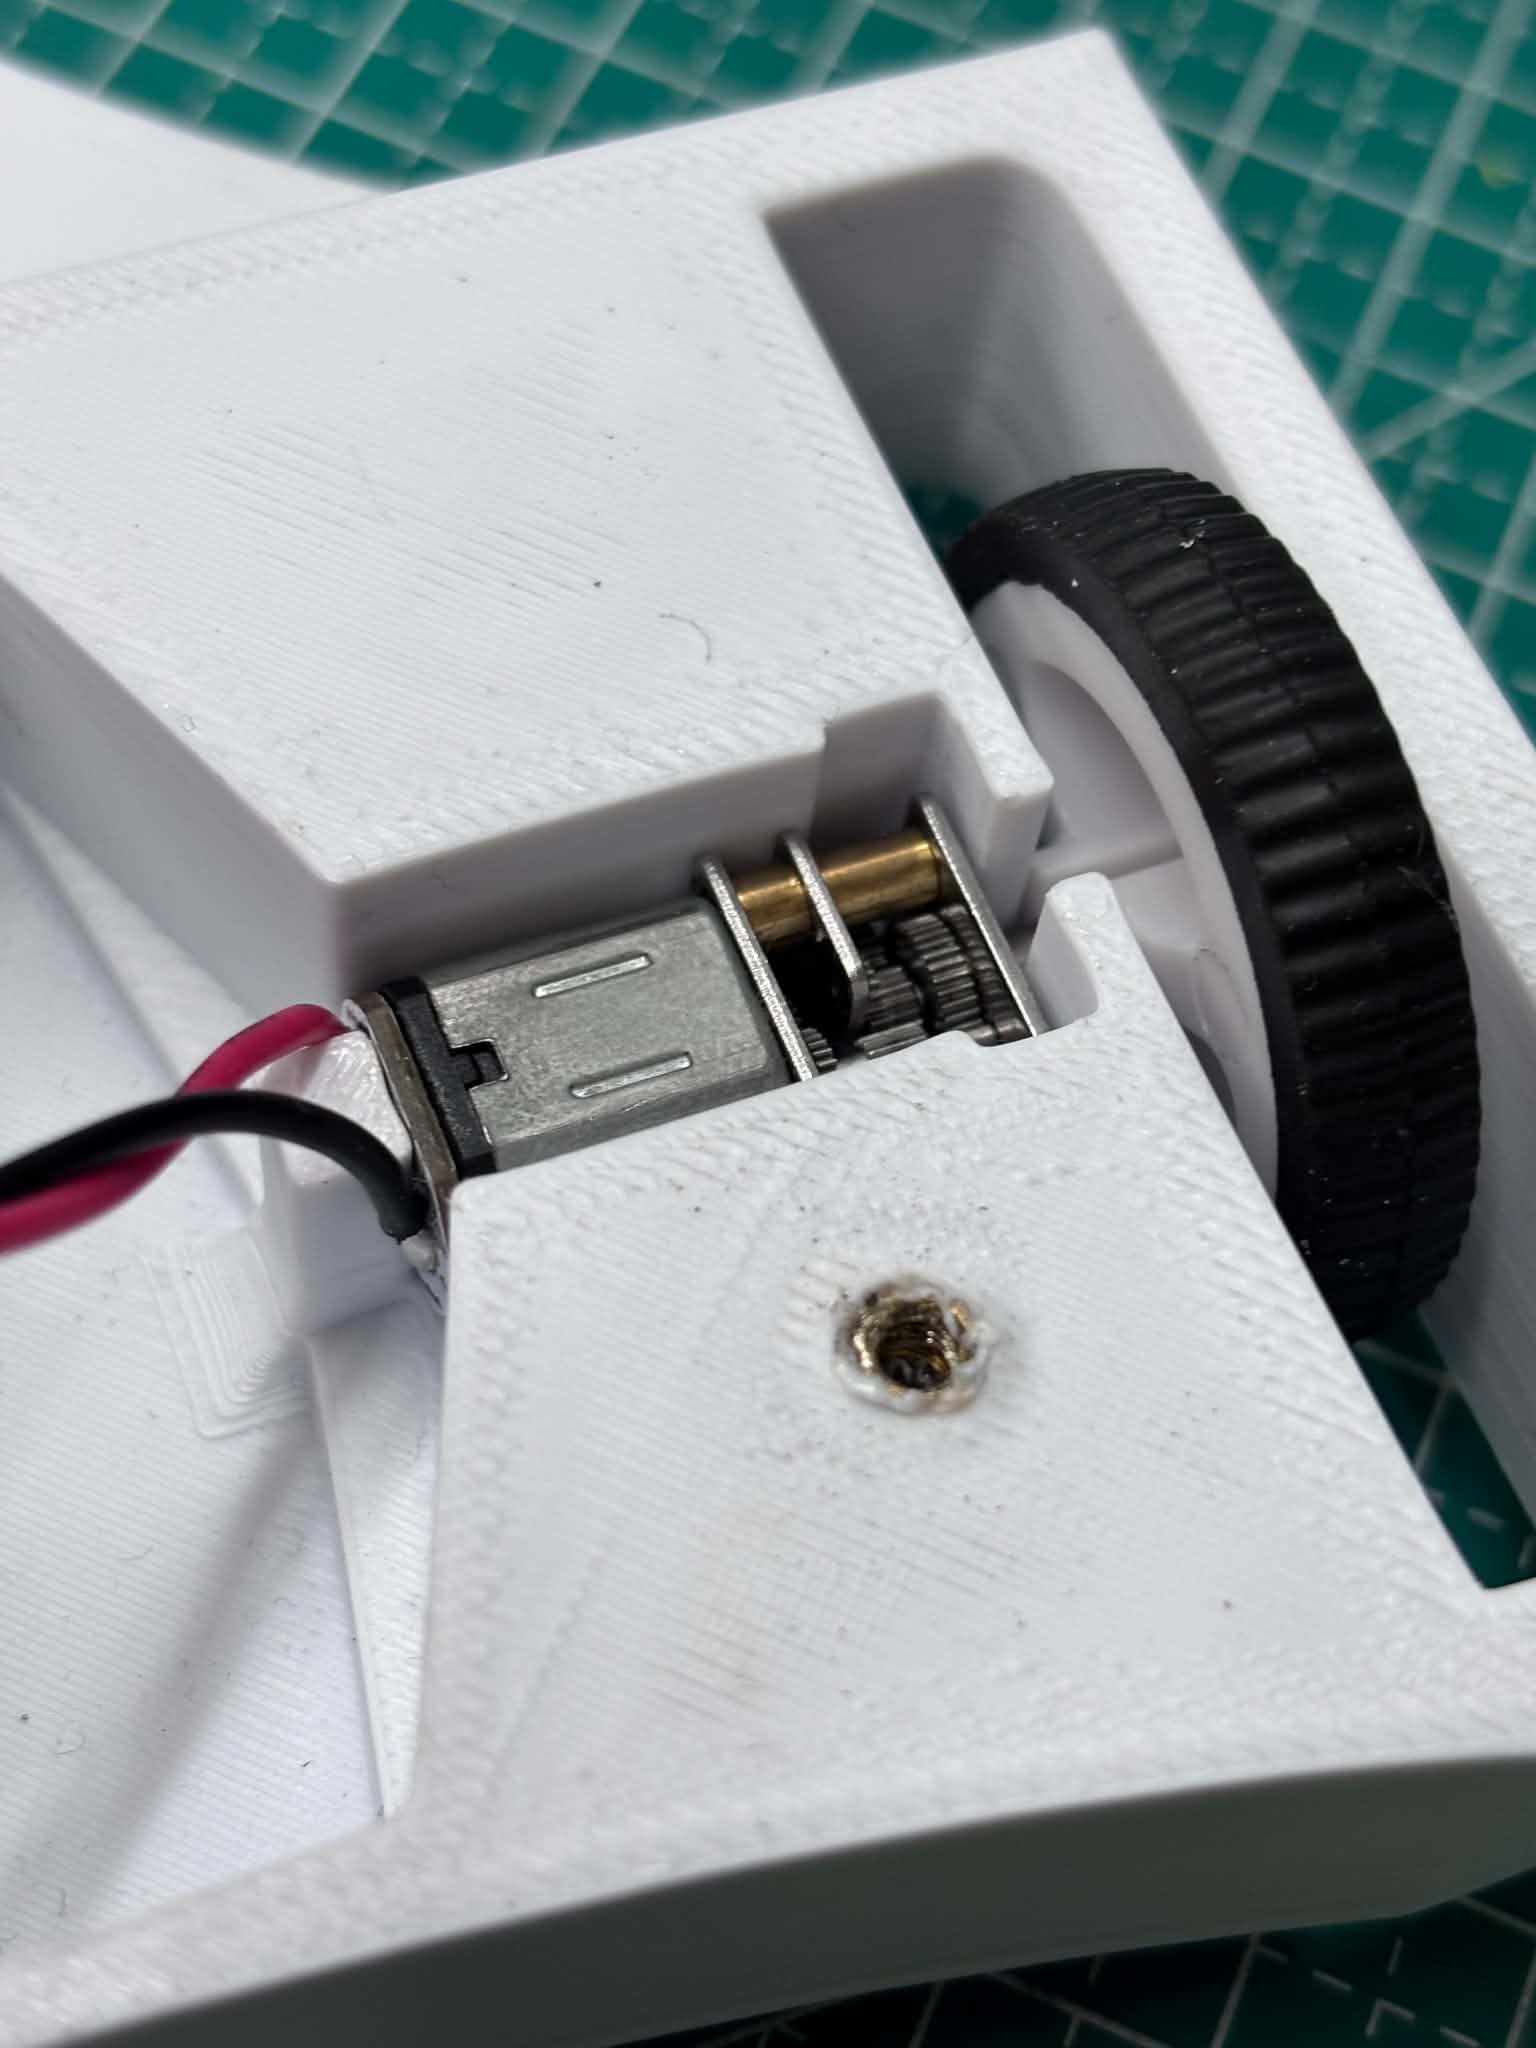
Step 2: motor in the chassis pocket.
Step 3: BLDC weapon motor in its printed holder.
Steps 4 and 5: screw switch in the bottom plate.
Step 6: weapon blade with the locknut.
Safety
- Remove the weapon blade when testing the drive and the radio link.
- Keep fingers and loose wires clear of the spinning blade.
- Turn the switch off before touching the robot.
- Test the weapon only inside an arena or with a safe barrier.
Final Check
Weigh the robot before you go to a competition. The limit is 200 g, and every gram counts.
Questions? Join our Discord and use code LTBEAST10 for 10% off every order.
Our advantages
- Excellent quality and always in stockAlways in stock, no backorder options
- Good priceOur store offers competitive prices for robot parts
- Shipping within 24hOrders placed before 12:00(CEST) are shipped the same day